Written by Craig B

What Are the rules of pickleball?

Read on to learn more about how to play Pickleball!

1. Court Setup and Equipment

  • Court Size: 20′ x 44′, the same size for both singles and doubles.
  • Net Height: 36 inches at the sidelines and 34 inches at the center.
  • Paddle and Ball: Played with a solid paddle (wood, composite, or graphite) and a perforated plastic ball (similar to a wiffle ball).

2. Serving

  • Underhand Serve: The serve must be made underhand with the paddle below the waist and contact with the ball made below the server’s waist.
  • Diagonal Direction: Serve diagonally to the opposite service box.
  • One Attempt: Only one serve attempt is allowed, except in the case of a “let” (when the ball touches the net but lands in the correct service box).
  • Both Feet Behind the Line: At least one foot must be behind the baseline during the serve.

3. The Double-Bounce Rule

  • After the serve, the receiving team must let the ball bounce once before returning it. Similarly, the serving team must let the return bounce once before playing it. After these two bounces, players may volley (hit the ball without letting it bounce) or play off the bounce.

4. Non-Volley Zone (The Kitchen)

  • The area within 7 feet on either side of the net is the non-volley zone, commonly called the “kitchen.”
  • Players cannot volley the ball (hit it out of the air) while standing inside the kitchen or touching the kitchen line.
  • Players may enter the kitchen to play a ball that has bounced but must exit before volleying the ball again.

5. Scoring

  • Points are Only Scored by the Serving Team: A team scores a point only if they win a rally while serving.
  • First to 11 Points: Games are typically played to 11 points, but a team must win by at least 2 points. Some tournaments or games may go to 15 or 21 points.
  • Switching Servers: In doubles, both players on a team serve before the serve is turned over to the opposing team, except at the start of the game, where the first server gets only one serve.
  • Side-Out: When the serving team loses a rally, it’s called a “side-out,” and the opposing team gets the chance to serve.

6. Faults

Faults result in the loss of serve or a point, and they occur when:

  • The ball is hit out of bounds.
  • The ball does not clear the net.
  • The ball is volleyed from within the non-volley zone (kitchen).
  • The ball bounces twice before it is returned.
  • The ball is struck more than once by the same team before going over the net.

7. Doubles Play

  • Each team member serves and rallies until both players have had a chance to serve (except for the first service of the game).
  • When the serving team wins a point, the server switches sides with their partner, and the server continues to serve.

8. Singles Play

  • The server serves from the right side when their score is even and from the left when their score is odd.
  • Other than that, the rules are the same as for doubles.

By mastering these rules, players can enjoy the game of pickleball whether in casual settings or competitive matches!

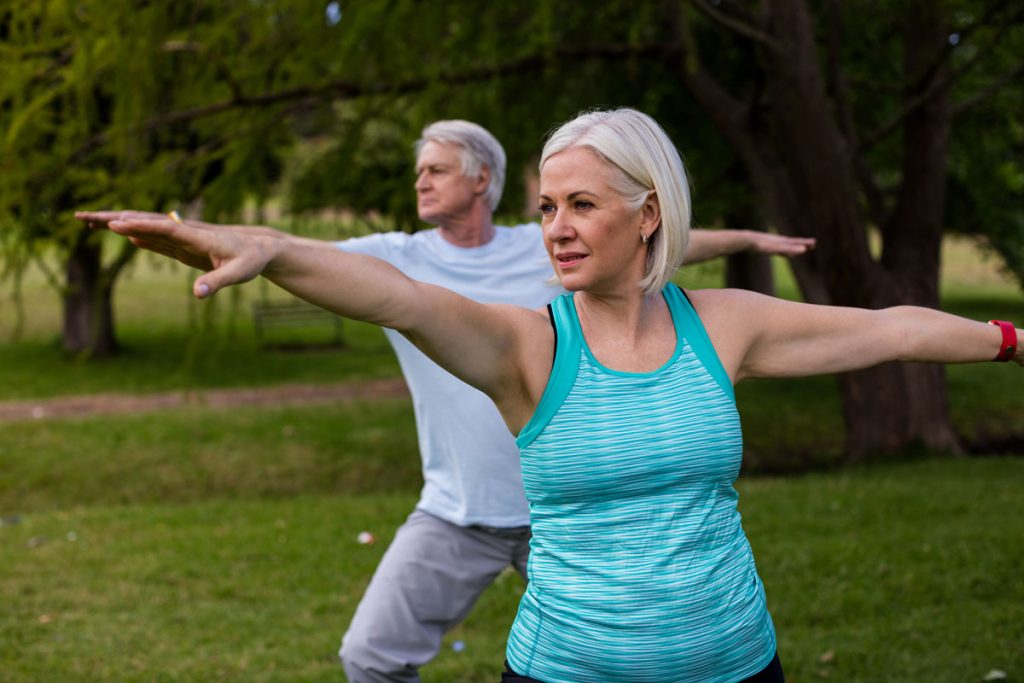
Pickleball is often considered an excellent sport for seniors for several reasons:

1. Low Impact:

  • Joint-Friendly: Pickleball is generally easy on the joints compared to high-impact sports like tennis or running. The smaller court and slower pace reduce stress on the knees, hips, and other joints.

2. Moderate Exercise:

  • Cardiovascular Benefits: The game provides good cardiovascular exercise, helping to maintain heart health and improve overall fitness.
  • Muscle Strength: It helps build and maintain muscle strength, particularly in the legs, arms, and core.

3. Social Interaction:

  • Community Aspect: Pickleball is often played in a social, friendly environment. It provides opportunities for socializing and meeting new people, which can be beneficial for mental health and well-being.

4. Easy to Learn:

  • Simple Rules: The game is relatively easy to pick up, with simple rules and a straightforward scoring system. This makes it accessible for beginners and those who may not have played sports before.

5. Adaptable:

  • Adjustable Intensity: Players can adjust the intensity of the game based on their fitness level. It can be played at a leisurely pace or more competitively, depending on the players’ preferences and abilities.

6. Cognitive Benefits:

  • Mental Stimulation: The game involves strategy, quick thinking, and hand-eye coordination, which can help keep the mind sharp and improve cognitive function.

7. Flexibility:

  • Indoor and Outdoor: Pickleball can be played both indoors and outdoors, allowing for year-round play regardless of weather conditions.

8. Safety:

  • Reduced Risk of Injury: Due to its lower impact nature and smaller court size, the risk of injury is relatively low compared to more intense sports.

Additional Tips for Seniors Playing Pickleball:

  • Warm-Up: Proper warm-up and stretching are important to prevent injuries and improve flexibility.
  • Proper Gear: Use supportive footwear and consider using a paddle with a comfortable grip to minimize strain on the hands and wrists.
  • Hydration: Stay hydrated and take breaks as needed, especially in hot weather.
  • Consult a Doctor: If you have any health concerns or conditions, consult with a healthcare provider before starting any new sport or exercise routine.

Overall, pickleball offers a fun, engaging, and health-promoting activity that can be enjoyed by seniors of various fitness levels.

How To Play Pickleball

Pickleball is a fun and accessible sport that combines elements of tennis, badminton, and table tennis. It’s played with a paddle and a plastic ball on a court similar to a badminton court. Here’s a basic guide on how to play pickleball:

1. Equipment:

  • Paddle: A solid, perforated paddle, usually made of composite materials or wood.
  • Ball: A lightweight plastic ball with holes, similar to a wiffle ball.
  • Net: A net set at a height of 34 inches in the center and 36 inches at the sidelines.
  • Court: A rectangular court measuring 20 feet by 44 feet for both singles and doubles, divided by a net.

2. Court Layout:

  • Service Area: The court is divided into two halves by the net. Each half has a service area, which is the area where serves are made.
  • Non-Volley Zone (Kitchen): A 7-foot area on either side of the net where players cannot volley (hit the ball before it bounces).

3. Basic Rules:

  • Objective: The objective is to score points by hitting the ball over the net and into the opponent’s side of the court, where it must bounce or be returned in play.
  • Serving:
    • The serve must be made underhand and diagonally into the opponent’s service area.
    • The server must stand behind the baseline and keep one foot behind the line.
    • The serve must clear the non-volley zone.
  • Double Bounce Rule: After the serve, each side must let the ball bounce once before volleying it (hitting it in the air).
  • Scoring:
    • Games are typically played to 11 points, but a team must win by at least 2 points.
    • Only the serving side can score points.
    • In doubles, each player on the serving side gets a chance to serve before the serve changes sides.
  • Faults:
    • A fault occurs if the ball lands outside the court, does not clear the net, or is hit into the non-volley zone on a volley.
    • Stepping into the non-volley zone and volleying the ball is also a fault.

4. Playing the Game:

  • Serving: The game starts with one player serving from the right side of their court. After each point, the server switches sides.
  • Rally: Players hit the ball back and forth over the net. Each side must return the ball before it bounces twice on their side.
  • Volleys and Groundstrokes: Players can hit the ball either on the bounce (groundstroke) or in the air (volley). However, volleys cannot be made from within the non-volley zone.
  • Switching Sides: In doubles, after scoring, the server switches sides with their partner, and the receiving team also switches sides.

5. Strategy:

  • Placement: Aim for open spaces on the opponent’s side of the court to make it harder for them to return the ball.
  • Positioning: Stay near the baseline when receiving serve and move towards the net as the rally progresses. For doubles, communicate and cover the court effectively with your partner.
  • Soft Shots: Use dinks (soft, controlled shots) to drop the ball into the non-volley zone, making it challenging for opponents to attack.

6. Scoring System:

  • Traditional Scoring: Points can only be scored by the serving side. The server continues to serve until a fault occurs.
  • No-Volley Zone: When serving, the ball must clear the no-volley zone (kitchen) to be considered a legal serve.

7. Etiquette:

  • Respect: Show respect for your opponents and teammates, and maintain good sportsmanship throughout the game.
  • Communication: In doubles, communicate with your partner about positioning and strategy.

8. Practice and Enjoyment:

  • Learn and Practice: Take time to practice basic shots, serving, and court positioning. Many communities offer beginner clinics and practice sessions.
  • Have Fun: Enjoy the game and the social aspects of pickleball. It’s designed to be accessible and enjoyable for players of all skill levels.

Pickleball is a great sport that emphasizes fun, fitness, and friendly competition. With these basics, you can start playing and enjoying the game!

Related Posts

The Vital Role Of Clinician Insight In Home Modifications and Accessibility Solutions

In today’s age of Amazon and direct access to durable medical equipment (DME), it’s tempting to assume that anyone can set up a safe and accessible home for individuals with mobility or health challenges. However, a recent experience reinforced for me the irreplaceable value of a trained eye when planning home modifications. As a seasoned [...]

Avoiding Falls In Public and at Home

Avoiding falls in public is crucial for seniors to maintain their safety and independence. Here are some practical tips to help prevent falls and reduce the risk of injury: 1. Wear Proper Footwear: Supportive Shoes: Choose shoes with good arch support, non-slip soles, and a secure fit. Avoid wearing high heels, flip-flops, or slippery-soled shoes. [...]

Is Pickleball A Good Sport For Seniors

Pickleball is often considered an excellent sport for seniors for several reasons: 1. Low Impact: Joint-Friendly: Pickleball is generally easy on the joints compared to high-impact sports like tennis or running. The smaller court and slower pace reduce stress on the knees, hips, and other joints. 2. Moderate Exercise: Cardiovascular Benefits: The game provides good [...]

Is Gout The Same As Arthritis?
Written by Craig B

Is Gout The Same As Arthritis?

What Is The Difference Between Arthritis And Bursitis

An excess of uric acid in the blood can cause gout, a kind of arthritis, which is characterized by the formation of sharp crystals in one or more joints. Gout can also occur in your knee, ankle, foot, hand, wrist, or elbow. Usually, it affects your big toe.

Attacks are abrupt, extremely painful, and frequently accompanied by swelling and redness surrounding the joint. The first 36 hours are usually the most painful, but they normally last three to ten days. Some patients never experience another attack for months or even years after the first one.

Who Understands It?

Gout affects men three to one woman. Men over 40 are also more likely to have it. After menopause, women are more likely to contract it.

If you consume alcohol frequently and are overweight, your chances increase. It may also be more likely to affect you if you:

Have a gouty family history
Consume certain diuretics (water pills) to lower blood pressure or certain medications to treat psoriasis or rheumatoid arthritis.
Have heart disease, diabetes, high blood pressure, or high cholesterol.
Possess surgical experience with gastric bypass

Why Does It Occur?

Your body produces uric acid in order to degrade a substance known as purine. This substance is found in some meals, such as red meat, shellfish, and sugary drinks like juice or cola, as well as in your body naturally.

When uric acid levels are normal, it dissolves in blood and is excreted from the body by urination. However, if your body produces excessive amounts of uric acid (hyperuricemia) or fails to excrete enough of it, crystals will develop, gather in your joints, and eventually cause gout.

Disfiguring lumps surrounding the damaged joint called tophi can also result from uric acid accumulation. Additionally, kidney stones may result from the crystals if they build up in the urinary tract.

Managing gout symptoms involves a combination of lifestyle changes, medication, and self-care strategies. Here are some effective ways to manage the condition:

1. Medications

  • Anti-Inflammatory Drugs (NSAIDs): Over-the-counter or prescription NSAIDs can help reduce pain and swelling during a gout flare-up.
  • Colchicine: A prescription medication that can decrease gout symptoms and prevent future flare-ups.
  • Corticosteroids: These may be prescribed to control severe inflammation and pain when NSAIDs or colchicine aren’t effective.
  • Uric Acid-Lowering Medications: Drugs like allopurinol or febuxostat can help lower uric acid levels to prevent future attacks.

2. Dietary Adjustments

  • Avoid High-Purine Foods: Limit intake of foods rich in purines like red meat, organ meats, shellfish, and oily fish (e.g., sardines and anchovies).
  • Reduce Alcohol and Sugary Drinks: Alcohol, especially beer, and drinks sweetened with fructose can trigger gout attacks.
  • Incorporate Low-Purine Foods: Focus on fruits, vegetables, whole grains, and low-fat dairy, which can help control uric acid levels.
  • Stay Hydrated: Drink plenty of water to help flush out uric acid and prevent crystal formation in the joints.

3. Maintain a Healthy Weight

  • Losing weight, if necessary, can help lower uric acid levels and reduce stress on the joints, decreasing the risk of gout attacks.

4. Stay Active

  • Engage in low-impact exercises like walking, swimming, and cycling to maintain joint flexibility without putting extra pressure on affected joints. However, avoid high-impact activities during a flare-up.

5. Manage Stress

  • High stress levels can exacerbate gout symptoms, so practicing relaxation techniques like meditation, deep breathing exercises, or yoga can help.

6. Apply Cold Compresses

  • During a flare-up, applying ice packs to the affected joint can help reduce swelling and pain.

7. Avoid Trauma to Joints

  • Protecting affected joints from further injury or stress can help prevent flare-ups.

By following these tips, individuals with gout can manage symptoms, prevent future attacks, and maintain a better quality of life. Regular consultations with a healthcare provider are crucial to adjusting treatment plans as needed.

Avoiding Falls In Public and at Home
Written by Craig B

Avoiding Falls In Public and at Home

Avoiding falls in public is crucial for seniors to maintain their safety and independence. Here are some practical tips to help prevent falls and reduce the risk of injury:

1. Wear Proper Footwear:

  • Supportive Shoes: Choose shoes with good arch support, non-slip soles, and a secure fit. Avoid wearing high heels, flip-flops, or slippery-soled shoes.
  • Avoid Slippers: Avoid wearing slippers or loose shoes outside, as they can increase the risk of tripping.

2. Use Assistive Devices:

  • Walking Aids: Use a cane, walker, or other mobility aids if needed. Make sure these devices are properly adjusted and maintained.
  • Grab Bars: Install grab bars in strategic places at home, such as near stairs and in the bathroom.

3. Be Mindful of Your Surroundings:

  • Watch Your Step: Pay attention to the ground and any potential hazards like uneven surfaces, potholes, or curbs.
  • Avoid Obstacles: Stay clear of obstacles such as outdoor furniture, signs, or other items that might be in your path.

4. Improve Balance and Strength:

  • Exercise Regularly: Engage in exercises that improve balance, strength, and flexibility, such as Tai Chi, yoga, or specific balance training exercises.
  • Strength Training: Incorporate strength training exercises to maintain muscle strength, which can help with stability.

5. Stay Hydrated and Nourished:

  • Hydration: Drink plenty of water, as dehydration can lead to dizziness and an increased risk of falling.
  • Balanced Diet: Maintain a balanced diet rich in calcium and vitamin D to support bone health and prevent falls.

6. Plan Your Outings:

  • Daylight: Whenever possible, plan to go out during daylight hours to improve visibility and avoid walking in low light.
  • Accompanied Travel: If possible, travel with a companion who can assist you if needed.

7. Use Safety Features:

  • Handrails: Utilize handrails on stairs and ramps. Ensure that they are sturdy and securely installed.
  • Well-Lit Areas: Choose well-lit routes and avoid poorly lit areas to reduce the risk of tripping or missing steps.

8. Monitor Health and Medication:

  • Regular Check-Ups: Have regular check-ups with your healthcare provider to monitor health conditions that may affect balance, such as vision or inner ear issues.
  • Medication Review: Review medications with your doctor, as some medications may cause dizziness or affect balance.

9. Practice Safe Walking Techniques:

  • Slow and Steady: Walk slowly and carefully, especially when navigating uneven surfaces or obstacles.
  • Focus: Keep your focus on where you’re walking rather than looking around or using your phone.

10. Use Fall Prevention Programs:

  • Community Programs: Participate in fall prevention programs offered by local community centers or health organizations. These programs often include exercises and education to help reduce fall risk.

11. Emergency Preparedness:

  • Emergency Contact: Carry a phone or an emergency alert device to call for help if you do fall or need assistance.
  • Medical Alert System: Consider using a medical alert system that allows you to call for help quickly if needed.

By incorporating these strategies into daily routines, seniors can significantly reduce their risk of falling in public and maintain greater confidence and safety while moving about.

Falls are a major cause of injuries and death among older adults. Here are some tips to help you avoid falls at home:

  • Make sure your home is well-lit. This will help you see where you are going and avoid tripping over objects.
  • Remove clutter from walkways. This will also help you avoid tripping.
  • Secure loose rugs and carpets. Loose rugs and carpets can be a tripping hazard. Secure them with double-sided tape or tacks.
  • Install grab bars in the bathroom and near stairs. Grab bars can help you steady yourself when you are getting up or down.
  • Use a cane or walker if you need one. A cane or walker can provide you with extra support and help you avoid falls.
  • Wear comfortable shoes that fit well. Shoes that are too loose or too tight can make you more likely to trip.
  • Get regular exercise. Exercise can help improve your balance and coordination, which can help you avoid falls.
  • Get your vision checked regularly. Poor vision can make it more difficult to see where you are going, which can increase your risk of falls.
  • Take your time. Don’t rush when you are walking or moving around. Take your time and be careful.
  • Tell your doctor if you have any balance or mobility problems. Your doctor can help you develop a plan to prevent falls.

If you have fallen in the past, it is important to take steps to prevent future falls. Talk to your doctor about your risk of falls and get help developing a plan to stay safe.

Here are some additional tips for older adults:

  • Get up and move around regularly. Don’t sit or lie down for long periods of time.
  • Stay hydrated. Dehydration can make you dizzy and more likely to fall.
  • Eat a healthy diet. A healthy diet can help you maintain a healthy weight, which can reduce your risk of falls.
  • Manage your chronic conditions. Conditions such as arthritis, heart disease, and diabetes can increase your risk of falls. Make sure to manage these conditions under the guidance of your doctor.
  • Stay mentally active. Mental activity can help improve your balance and coordination.
  • Stay socially active. Social activity can help reduce stress, which can also increase your risk of falls.

By following these tips, you can help reduce your risk of falls and stay safe at home.

There are many comfortable shoes for seniors on the market, but some of the most popular include:

  • Walking shoes: Walking shoes are designed to provide support and comfort for walking. They typically have cushioned soles and arch support.
    Walking shoes for seniors
  • Running shoes: Running shoes are designed for high-impact activities like running. They typically have more cushioning than walking shoes and may also have features to prevent ankle rolling.
    Running shoes for seniors
  • Trail shoes: Trail shoes are designed for walking or hiking on uneven surfaces. They typically have good traction and durability.
    Trail shoes for seniors
  • Diabetic shoes: Diabetic shoes are designed for people with diabetes. They typically have features to help prevent foot ulcers, such as extra width and cushioning.
    Diabetic shoes for seniors
  • Comfort shoes: Comfort shoes are designed to be as comfortable as possible. They may have features such as memory foam or gel inserts.
    Comfort shoes for seniors

When choosing comfortable shoes for seniors, it is important to consider the following factors:

  • The person’s foot type: Some people have wider feet, while others have narrower feet. It is important to choose shoes that fit the person’s foot type well.
  • The person’s activity level: If the person is active, they will need shoes that provide more support and cushioning. If the person is less active, they may be able to get away with shoes that are less supportive.
  • The person’s budget: There are a variety of comfortable shoes available at different price points. It is important to choose shoes that fit the person’s budget.

It is also important to have the shoes fitted by a qualified professional, such as a podiatrist or an orthotist. This will help ensure that the shoes provide the correct amount of support and comfort.

Here are some additional tips for choosing comfortable shoes for seniors:

  • Try on the shoes at the end of the day: Your feet tend to swell throughout the day, so it is important to try on shoes at the end of the day when your feet are at their largest.
  • Walk around in the shoes: Don’t just stand in the shoes when you try them on. Walk around in them to make sure they are comfortable and provide good support.
  • Bend your knees: When you bend your knees, the shoes should not feel too tight.
  • Have the salesperson check the fit: The salesperson should be able to check the fit of the shoes and make sure they are not too tight or too loose.

Balance issues are common in older adults. They can be caused by a variety of factors, including:

  • Age-related changes in the inner ear: The inner ear is responsible for balance, and it can start to decline with age.
  • Vision problems: Poor vision can make it difficult to see where you are going, which can lead to balance problems.
  • Dehydration: Dehydration can make you dizzy and more likely to fall.
  • Medications: Some medications can cause dizziness or drowsiness, which can increase the risk of falls.
  • Medical conditions: Medical conditions such as arthritis, diabetes, and Parkinson’s disease can also increase the risk of balance problems.

Balance problems can lead to falls, which are a major cause of injuries and death in older adults. If you are a senior, it is important to take steps to prevent balance problems and falls.

Here are some tips for preventing balance problems in seniors:

  • Get regular exercise: Exercise can help improve balance and coordination.
  • Wear comfortable shoes that fit well: Shoes that are too loose or too tight can make you more likely to trip.
  • Make sure your home is well-lit: This will help you see where you are going and avoid tripping over objects.
  • Remove clutter from walkways: This will also help you avoid tripping.
  • Secure loose rugs and carpets: Loose rugs and carpets can be a tripping hazard. Secure them with double-sided tape or tacks.
  • Install grab bars in the bathroom and near stairs: Grab bars can help you steady yourself when you are getting up or down.
  • Use a cane or walker if you need one: A cane or walker can provide you with extra support and help you avoid falls.
  • Get your vision checked regularly: Poor vision can make it more difficult to see where you are going, which can increase your risk of falls.
  • Take your time: Don’t rush when you are walking or moving around. Take your time and be careful.
  • Tell your doctor if you have any balance or mobility problems: Your doctor can help you develop a plan to prevent falls.

If you have fallen in the past, it is important to take steps to prevent future falls. Talk to your doctor about your risk of falls and get help developing a plan to stay safe.

Written by Craig B

Is Pickleball A Good Sport For Seniors

Pickleball is often considered an excellent sport for seniors for several reasons:

1. Low Impact:

  • Joint-Friendly: Pickleball is generally easy on the joints compared to high-impact sports like tennis or running. The smaller court and slower pace reduce stress on the knees, hips, and other joints.

2. Moderate Exercise:

  • Cardiovascular Benefits: The game provides good cardiovascular exercise, helping to maintain heart health and improve overall fitness.
  • Muscle Strength: It helps build and maintain muscle strength, particularly in the legs, arms, and core.

3. Social Interaction:

  • Community Aspect: Pickleball is often played in a social, friendly environment. It provides opportunities for socializing and meeting new people, which can be beneficial for mental health and well-being.

4. Easy to Learn:

  • Simple Rules: The game is relatively easy to pick up, with simple rules and a straightforward scoring system. This makes it accessible for beginners and those who may not have played sports before.

5. Adaptable:

  • Adjustable Intensity: Players can adjust the intensity of the game based on their fitness level. It can be played at a leisurely pace or more competitively, depending on the players’ preferences and abilities.

6. Cognitive Benefits:

  • Mental Stimulation: The game involves strategy, quick thinking, and hand-eye coordination, which can help keep the mind sharp and improve cognitive function.

7. Flexibility:

  • Indoor and Outdoor: Pickleball can be played both indoors and outdoors, allowing for year-round play regardless of weather conditions.

8. Safety:

  • Reduced Risk of Injury: Due to its lower impact nature and smaller court size, the risk of injury is relatively low compared to more intense sports.

Additional Tips for Seniors Playing Pickleball:

  • Warm-Up: Proper warm-up and stretching are important to prevent injuries and improve flexibility.
  • Proper Gear: Use supportive footwear and consider using a paddle with a comfortable grip to minimize strain on the hands and wrists.
  • Hydration: Stay hydrated and take breaks as needed, especially in hot weather.
  • Consult a Doctor: If you have any health concerns or conditions, consult with a healthcare provider before starting any new sport or exercise routine.

Overall, pickleball offers a fun, engaging, and health-promoting activity that can be enjoyed by seniors of various fitness levels.

How To Play Pickleball

Pickleball is a fun and accessible sport that combines elements of tennis, badminton, and table tennis. It’s played with a paddle and a plastic ball on a court similar to a badminton court. Here’s a basic guide on how to play pickleball:

1. Equipment:

  • Paddle: A solid, perforated paddle, usually made of composite materials or wood.
  • Ball: A lightweight plastic ball with holes, similar to a wiffle ball.
  • Net: A net set at a height of 34 inches in the center and 36 inches at the sidelines.
  • Court: A rectangular court measuring 20 feet by 44 feet for both singles and doubles, divided by a net.

2. Court Layout:

  • Service Area: The court is divided into two halves by the net. Each half has a service area, which is the area where serves are made.
  • Non-Volley Zone (Kitchen): A 7-foot area on either side of the net where players cannot volley (hit the ball before it bounces).

3. Basic Rules:

  • Objective: The objective is to score points by hitting the ball over the net and into the opponent’s side of the court, where it must bounce or be returned in play.
  • Serving:
    • The serve must be made underhand and diagonally into the opponent’s service area.
    • The server must stand behind the baseline and keep one foot behind the line.
    • The serve must clear the non-volley zone.
  • Double Bounce Rule: After the serve, each side must let the ball bounce once before volleying it (hitting it in the air).
  • Scoring:
    • Games are typically played to 11 points, but a team must win by at least 2 points.
    • Only the serving side can score points.
    • In doubles, each player on the serving side gets a chance to serve before the serve changes sides.
  • Faults:
    • A fault occurs if the ball lands outside the court, does not clear the net, or is hit into the non-volley zone on a volley.
    • Stepping into the non-volley zone and volleying the ball is also a fault.

4. Playing the Game:

  • Serving: The game starts with one player serving from the right side of their court. After each point, the server switches sides.
  • Rally: Players hit the ball back and forth over the net. Each side must return the ball before it bounces twice on their side.
  • Volleys and Groundstrokes: Players can hit the ball either on the bounce (groundstroke) or in the air (volley). However, volleys cannot be made from within the non-volley zone.
  • Switching Sides: In doubles, after scoring, the server switches sides with their partner, and the receiving team also switches sides.

5. Strategy:

  • Placement: Aim for open spaces on the opponent’s side of the court to make it harder for them to return the ball.
  • Positioning: Stay near the baseline when receiving serve and move towards the net as the rally progresses. For doubles, communicate and cover the court effectively with your partner.
  • Soft Shots: Use dinks (soft, controlled shots) to drop the ball into the non-volley zone, making it challenging for opponents to attack.

6. Scoring System:

  • Traditional Scoring: Points can only be scored by the serving side. The server continues to serve until a fault occurs.
  • No-Volley Zone: When serving, the ball must clear the no-volley zone (kitchen) to be considered a legal serve.

7. Etiquette:

  • Respect: Show respect for your opponents and teammates, and maintain good sportsmanship throughout the game.
  • Communication: In doubles, communicate with your partner about positioning and strategy.

8. Practice and Enjoyment:

  • Learn and Practice: Take time to practice basic shots, serving, and court positioning. Many communities offer beginner clinics and practice sessions.
  • Have Fun: Enjoy the game and the social aspects of pickleball. It’s designed to be accessible and enjoyable for players of all skill levels.

Pickleball is a great sport that emphasizes fun, fitness, and friendly competition. With these basics, you can start playing and enjoying the game!

Related Posts

How Seniors Can Keep Healthy This Summer
Written by Craig B

Keeping Healthy For Seniors 2024

Maintaining health as a senior involves a holistic approach that encompasses physical, mental, and emotional well-being. Here are some comprehensive tips for seniors to stay healthy:

Physical Health

  1. Regular Exercise:
    • Engage in moderate physical activities such as walking, swimming, or tai chi for at least 30 minutes a day, most days of the week.
    • Incorporate strength training exercises to maintain muscle mass and bone density.
    • Include flexibility and balance exercises to reduce the risk of falls.
  2. Balanced Diet:
    • Eat a variety of fruits, vegetables, whole grains, lean proteins, and healthy fats.
    • Stay hydrated by drinking plenty of water throughout the day.
    • Limit salt, sugar, and saturated fats to reduce the risk of chronic diseases.
  3. Regular Health Check-Ups:
    • Schedule annual check-ups and routine screenings (e.g., blood pressure, cholesterol, cancer screenings).
    • Keep vaccinations up to date, including flu and pneumonia vaccines.
    • Monitor and manage chronic conditions like diabetes, hypertension, and arthritis with the help of healthcare providers.
  4. Medication Management:
    • Take medications as prescribed and keep an updated list of all medications.
    • Discuss any side effects or concerns with your doctor or pharmacist.
    • Use a pill organizer to avoid missed or double doses.
  5. Good Sleep Hygiene:
    • Aim for 7-9 hours of sleep per night.
    • Establish a regular sleep routine and create a comfortable sleep environment.
    • Avoid caffeine and heavy meals before bedtime.

Mental Health

  1. Stay Mentally Active:
    • Engage in activities that challenge the brain, such as puzzles, reading, or learning new skills.
    • Stay curious and continue to learn new things.
  2. Social Connections:
    • Maintain strong social connections with family, friends, and community.
    • Participate in social activities, clubs, or volunteer work.
    • Use technology to stay in touch with loved ones if in-person meetings are not possible.
  3. Stress Management:
    • Practice relaxation techniques such as deep breathing, meditation, or yoga.
    • Engage in hobbies and activities that bring joy and relaxation.
    • Seek support from friends, family, or professionals when feeling overwhelmed.

Emotional Well-Being

  1. Positive Attitude:
    • Focus on the positives and practice gratitude.
    • Set realistic goals and celebrate small achievements.
    • Maintain a sense of purpose through activities and relationships.
  2. Emotional Support:
    • Don’t hesitate to talk about your feelings with trusted friends or family.
    • Consider joining support groups for seniors to share experiences and receive encouragement.
    • Seek professional help if experiencing signs of depression or anxiety.

Safety and Prevention

  1. Fall Prevention:
    • Keep the home free of tripping hazards, such as loose rugs or clutter.
    • Install grab bars in the bathroom and handrails on stairs.
    • Use non-slip mats in the bathtub and shower.
  2. Home Safety:
    • Ensure good lighting in all areas of the home.
    • Keep emergency numbers easily accessible.
    • Consider wearing a medical alert system if living alone.
  3. Healthy Living Environment:
    • Maintain a clean and organized living space.
    • Ensure proper ventilation and air quality.
    • Regularly check for safety issues like smoke detectors and carbon monoxide alarms.

Lifestyle Adjustments

  1. Avoid Tobacco and Limit Alcohol:
    • Quit smoking to improve overall health and reduce the risk of many diseases.
    • Limit alcohol intake to moderate levels as advised by healthcare providers.
  2. Healthy Weight Management:
    • Maintain a healthy weight through balanced diet and regular exercise.
    • Seek guidance from healthcare providers for personalized weight management plans.
  3. Hydration:
    • Drink enough fluids daily, as seniors are more prone to dehydration.
    • Include a variety of fluids, such as water, herbal teas, and soups.

By adopting these practices, seniors can significantly improve their quality of life and maintain their independence and well-being for as long as possible. Regular communication with healthcare providers is essential to tailor these tips to individual needs and conditions.

Related Posts

Home Safety Tips
Written by Craig B

2024 Home Safety Tips

Home Safety Tips

Ensuring home safety involves taking proactive measures to prevent accidents and protect your household from various risks. Here are some comprehensive tips to enhance home safety:

General Home Safety

  1. Install Smoke and Carbon Monoxide Detectors:
    • Place smoke detectors on every floor, in each bedroom, and outside sleeping areas.
    • Install carbon monoxide detectors near bedrooms and on each floor.
    • Test detectors monthly and change batteries at least once a year.
  2. Fire Safety:
    • Keep a fire extinguisher in the kitchen and other key areas.
    • Develop and practice a fire escape plan with your family.
    • Never leave cooking unattended, and keep flammable items away from the stove.
  3. Electrical Safety:
    • Replace frayed or damaged cords immediately.
    • Avoid overloading outlets; use surge protectors.
    • Keep electrical appliances away from water.
  4. Fall Prevention:
    • Install handrails on staircases and in bathrooms.
    • Use non-slip mats in the bathroom and secure rugs with non-slip pads.
    • Keep walkways and stairs clear of clutter.
  5. Poison Control:
    • Store cleaning supplies, medicines, and hazardous materials out of reach of children.
    • Label all chemicals clearly and keep them in their original containers.
    • Have the Poison Control Center number (1-800-222-1222 in the U.S.) handy.

Security Measures

  1. Locks and Doors:
    • Use deadbolts on exterior doors.
    • Install peepholes or video doorbells to see who is outside.
    • Reinforce sliding doors with bars or special locks.
  2. Windows:
    • Install window locks and ensure they are locked when not in use.
    • Use window bars or security film for additional protection.
  3. Lighting:
    • Install exterior lighting around your home, especially near entrances.
    • Use timers or smart lights to make it appear someone is home when you’re away.
  4. Alarm Systems:
    • Install a home security system with monitoring services.
    • Use motion detectors and security cameras for added protection.

Child Safety

  1. Childproofing:
    • Install safety gates at the top and bottom of stairs.
    • Use cabinet locks to prevent access to dangerous items.
    • Cover electrical outlets with safety plugs.
  2. Safe Sleep Practices:
    • Place babies on their backs to sleep, in a crib with a firm mattress.
    • Keep the crib free of soft bedding, toys, and pillows.

Emergency Preparedness

  1. First Aid Kit:
    • Keep a well-stocked first aid kit accessible, and ensure family members know where it is.
    • Include bandages, antiseptic, pain relievers, and any necessary prescription medications.
  2. Emergency Numbers:
    • Post emergency contact numbers near phones and ensure all family members know them.
    • Teach children how to dial emergency services.
  3. Natural Disasters:
    • Know the risks in your area (e.g., earthquakes, floods) and have a plan in place.
    • Prepare an emergency kit with essentials like water, food, flashlights, and batteries.
  4. Escape Plan:
    • Create and practice a home escape plan for different emergency scenarios.
    • Ensure everyone knows two ways out of each room and has a designated meeting spot outside.

Health and Hygiene

  1. Cleanliness:
    • Regularly clean and disinfect high-touch surfaces to prevent illness.
    • Keep the home free from mold and pests.
  2. Air Quality:
    • Use air purifiers to reduce allergens and pollutants.
    • Ensure proper ventilation, especially when using chemicals or during cooking.

By following these tips, you can create a safer environment for you and your family. Regularly review and update your safety measures to adapt to any new risks or changes in your household.

Choosing A Cane or A Walker

Choosing the right mobility aid, whether it is a cane or a walker, can be a difficult decision. There are many factors to consider, such as your individual needs, preferences, and activities.

Here are some things to think about when choosing between a cane and a walker:

  • Your level of balance: If you have good balance, a cane may be sufficient. If you have poor balance, a walker may be a better option.
  • Your activity level: If you are active and mobile, a cane may be a good choice. If you are less active, a walker may be a better option.
  • Your lifestyle: If you live in a small space, a cane may be a better choice. If you live in a large space, a walker may be a better option.
  • Your budget: Canes and walkers can range in price from a few dollars to several hundred dollars. Consider your budget when making your decision.

Here are some of the different types of canes and walkers available:

  • Straight canes: Straight canes are the most common type of cane. They are lightweight and easy to use.
    Straight cane
  • Quad canes: Quad canes have four legs, which provide more stability than a straight cane.
    Quad cane
  • Folding canes: Folding canes are easy to transport and store.
    Folding cane
  • Rollators: Rollators are walkers with wheels. They are easier to use than traditional walkers, but they can be more difficult to maneuver in tight spaces.
    Rollator
  • Quadruped walkers: Quadruped walkers have four legs, like a quad cane, but they also have wheels. This makes them a good option for people who need more stability than a straight cane, but who also want the convenience of wheels.
    Quadruped walker

If you are not sure which type of mobility aid is right for you, talk to your doctor or a physical therapist. They can help you assess your needs and make the best recommendation for you.

Here are some additional tips for choosing a cane or a walker:

  • Try out different types of canes and walkers before you buy one. This will help you find the one that is most comfortable and easy to use for you.
  • Make sure the cane or walker is the right height for you. The top of the cane or walker should be level with your wrist when you are standing upright.
  • The cane or walker should be sturdy and well-made. It should not wobble or feel unstable.
  • The cane or walker should be easy to grip. The handle should be comfortable and non-slip.

By following these tips, you can choose the right mobility aid to help you stay safe and mobile.

2024 Home Safety Assessments And Evaluations
Written by Craig B

2024 Home Safety Assessments And Evaluations

Home safety assessments and evaluations are crucial for identifying and mitigating potential hazards in residential properties. These assessments help ensure the safety and well-being of occupants by addressing various risks such as fire hazards, electrical issues, structural problems, and other safety concerns. Here is an overview of what to consider for home safety assessments and evaluations in 2024.

What can I expect from a home safety assessment? Who will evaluate my environment? What happens following the assessment?

Key Components of a Home Safety Assessment

  1. Fire Safety:
    • Smoke Detectors: Ensure that smoke detectors are installed in every bedroom, outside each sleeping area, and on every level of the home. Test them monthly and replace batteries at least once a year.
    • Fire Extinguishers: Have fire extinguishers accessible in key areas such as the kitchen, garage, and workshop. Ensure everyone in the household knows how to use them.
    • Escape Plan: Develop and practice a fire escape plan with all household members. Ensure that windows and doors open easily and that escape routes are free of obstructions.
  2. Electrical Safety:
    • Wiring and Outlets: Inspect wiring for signs of wear, fraying, or damage. Ensure outlets are not overloaded and use surge protectors where necessary.
    • Circuit Breakers: Make sure circuit breakers are functioning correctly and are not tripping frequently, which can indicate underlying electrical issues.
    • Ground Fault Circuit Interrupters (GFCIs): Install GFCIs in bathrooms, kitchens, and other areas where water is present to prevent electrical shock.
  3. Structural Safety:
    • Foundation and Walls: Check for cracks in the foundation, walls, and ceilings. These can indicate settling or other structural issues that need professional evaluation.
    • Roof and Gutters: Inspect the roof for missing or damaged shingles and ensure gutters are clean and properly directing water away from the foundation.
    • Windows and Doors: Ensure windows and doors are in good condition, with no broken panes or damaged frames that could compromise security or energy efficiency.
  4. Plumbing Safety:
    • Leaks and Water Damage: Inspect for leaks under sinks, around toilets, and near water heaters. Address any signs of water damage or mold promptly.
    • Water Heater: Ensure the water heater is set to a safe temperature (typically 120 degrees Fahrenheit) to prevent scalding.
  5. Environmental Safety:
    • Asbestos and Lead: If your home was built before the 1980s, consider having it inspected for asbestos and lead paint, both of which can pose serious health risks.
    • Radon Testing: Test for radon, a colorless, odorless gas that can cause lung cancer. Radon mitigation systems can be installed if high levels are detected.
  6. Security:
    • Locks and Deadbolts: Ensure all exterior doors have sturdy locks and deadbolts. Consider adding a security system with alarms and cameras.
    • Lighting: Install motion-sensor lights around the exterior of the home to deter intruders and increase visibility at night.
  7. Child Safety:
    • Childproofing: Use safety gates, cabinet locks, and outlet covers to protect young children from hazards. Secure heavy furniture and appliances to prevent tipping.
  8. Accessibility:
    • Handrails and Grab Bars: Install handrails on all stairs and grab bars in bathrooms to prevent falls.
    • Ramps and Thresholds: Ensure ramps and smooth thresholds are available for wheelchair access if needed.

Professional Home Safety Evaluation Services

In 2024, many professional services offer comprehensive home safety evaluations. These services typically include:

  • Certified Inspectors: Professional inspectors with certification and experience in home safety assessments.
  • Detailed Reports: Comprehensive reports outlining identified hazards, recommended actions, and potential costs.
  • Follow-Up: Some services include follow-up visits to ensure that recommended safety measures have been implemented.

DIY Home Safety Checks

While professional assessments are thorough, homeowners can also perform basic safety checks themselves using home safety checklists available online. These checklists guide homeowners through various areas of the home, highlighting common hazards and how to address them.

Cost of Home Safety Assessments

The cost of a professional home safety assessment varies depending on the size and complexity of the home, as well as the region. On average, homeowners can expect to pay between $200 and $500 for a comprehensive safety evaluation. Additional costs may be incurred for specialized testing (e.g., radon, asbestos) or follow-up services.

Conclusion

Regular home safety assessments are essential for maintaining a safe living environment. By identifying and addressing potential hazards, homeowners can prevent accidents, reduce the risk of injuries, and ensure peace of mind for themselves and their families. Whether through professional services or DIY efforts, making home safety a priority is a wise investment in health and well-being.

Related Posts

Written by Craig B

Non Slip Floor Treatments

Non Slip Floor Treatments

Non-slip floor treatments are coatings or solutions applied to surfaces to enhance traction and reduce the risk of slipping. These treatments are commonly used in environments where slips and falls are a concern, such as commercial kitchens, bathrooms, swimming pool decks, and industrial settings. Here are some common non-slip floor treatments:

  1. Non-slip coatings: These are typically applied as a paint or epoxy coating onto the floor surface. They contain additives such as silica sand or aluminum oxide to provide texture and improve grip.

  2. Non-slip mats or tiles: These are pre-made mats or tiles with textured surfaces designed to provide traction. They can be placed over existing floors to create a non-slip surface.

  3. Anti-slip tapes: These are adhesive-backed tapes with a textured surface that can be applied to stairs, ramps, or other areas prone to slipping. They are easy to apply and can provide temporary or permanent non-slip solutions.

  4. Chemical treatments: Some chemical solutions can be applied to floors to increase traction. These treatments often work by etching the surface of the floor to create a rougher texture.

  5. Grinding and etching: For concrete floors, grinding or etching the surface can create texture and improve grip. This method is often used in industrial settings where heavy machinery is present.

  6. Aggregate additives: Adding aggregates such as sand or aluminum oxide to floor coatings or sealants can improve traction. These additives are often mixed into the coating before application.

  7. Resilient flooring: Certain types of flooring materials, such as rubber or cork, inherently provide better traction than others. Choosing a resilient flooring material can reduce the need for additional non-slip treatments.

When selecting a non-slip floor treatment, it’s essential to consider factors such as the type of surface, the level of foot traffic, and any specific safety requirements. Additionally, regular maintenance and cleaning are crucial to ensuring the effectiveness of non-slip treatments over time.

Non Sleep Floor Treatments in Bathrooms

Non-slip floor treatments are particularly important in bathrooms where surfaces can become slippery due to water and humidity. Here are some effective non-slip floor treatments specifically suitable for bathrooms:

  1. Textured tiles: Opt for tiles with textured surfaces such as matte or honed finishes rather than glossy ones. These textures provide better traction, especially when wet.

  2. Pebble tiles: Pebble tiles feature natural stone pebbles set in a mesh backing. The uneven surface of these tiles creates a naturally non-slip floor.

  3. Ceramic or porcelain tiles with anti-slip coatings: Some ceramic or porcelain tiles come with anti-slip coatings applied during manufacturing. These coatings increase traction without compromising the appearance of the tiles.

  4. Vinyl flooring: Vinyl flooring is inherently water-resistant and often comes with textured surfaces that offer better grip. Additionally, luxury vinyl tiles (LVT) can mimic the look of natural materials like wood or stone while providing non-slip properties.

  5. Rubber flooring: Rubber flooring is resilient, water-resistant, and provides excellent traction, making it an ideal choice for bathrooms. It’s available in a variety of colors and textures to suit different design preferences.

  6. Non-slip mats or rugs: Place non-slip mats or rugs near the bathtub, shower, and sink areas to provide additional traction when stepping in and out of these wet areas.

  7. Non-slip coatings or sealants: Apply non-slip coatings or sealants specifically designed for bathroom floors. These products create a textured surface that improves grip without altering the appearance of the floor.

  8. Anti-slip treatments: Chemical treatments or additives can be applied to existing tiles or flooring surfaces to enhance traction. These treatments work by etching or roughening the surface to reduce slipperiness.

When selecting a non-slip floor treatment for bathrooms, consider factors such as durability, ease of cleaning, and aesthetic appeal. Additionally, ensure that the chosen treatment complies with safety standards and regulations to minimize the risk of slips and falls in the bathroom. Regular maintenance and cleaning are also essential to preserve the effectiveness of non-slip treatments over time.

Non Slip Flooring In Living Rooms

When considering non-slip flooring options for living rooms, you’ll want to balance safety with aesthetics and comfort. Here are some suitable options:

  1. Carpeting: Wall-to-wall carpeting can provide a soft and slip-resistant surface for living rooms. Look for carpets with low pile heights or looped textures, as these tend to offer better traction. Additionally, consider installing carpet pads underneath to enhance cushioning and stability.

  2. Textured hardwood or laminate flooring: Opt for hardwood or laminate flooring with textured finishes rather than smooth, glossy surfaces. Textured finishes provide better traction, especially when walking in socks or barefoot.

  3. Rubber flooring: Rubber flooring is not only durable and easy to maintain but also inherently slip-resistant. It comes in a variety of colors and designs, allowing you to customize the look of your living room while ensuring safety.

  4. Cork flooring: Cork flooring is naturally slip-resistant due to its slightly textured surface. It’s also comfortable to walk on and provides excellent insulation against noise and temperature.

  5. Vinyl plank flooring: Vinyl plank flooring is water-resistant, durable, and available in textured finishes that mimic the look of hardwood or stone. It provides good traction underfoot and is relatively easy to install and maintain.

  6. Area rugs with non-slip backing: If you prefer hard flooring like hardwood or tile in your living room, consider placing area rugs with non-slip backing in high-traffic areas. These rugs can provide added traction and comfort while protecting the underlying floor surface.

  7. Textured ceramic or porcelain tiles: If you prefer the look of tile flooring, choose ceramic or porcelain tiles with textured surfaces. These tiles offer better grip, especially when wet, reducing the risk of slips and falls.

When selecting non-slip flooring for living rooms, consider factors such as durability, maintenance requirements, and design preferences. It’s essential to strike a balance between safety and style to create a comfortable and inviting living space for your family and guests. Additionally, ensure proper installation and maintenance to maximize the longevity and effectiveness of the chosen flooring option.

Avoiding Falls In Public and at Home
Written by Craig B

Installing Safety Grab Bars

Installing safety grab bars can be a relatively straightforward DIY project, but it’s important to ensure their proper installation for safety and functionality. Here’s what you need to know:

Before you begin:

  • Planning and Location:

    • Identify the user’s needs: Consider their height, strength, and specific requirements when choosing locations and types of grab bars.
    • Choose the right locations: Common areas for grab bars include next to toilets, bathtubs, and showers. Ensure they are positioned for easy reach and leverage during transfers.
    • Check your local building codes: Some areas might have specific requirements for grab bar installation.
  • Tools and Materials:

    • Grab bars (choose appropriate weight capacity and style for your needs)
    • Stud finder
    • Drill and drill bits (suitable for your wall material)
    • Level
    • Pencil
    • Screws or appropriate mounting hardware (depending on wall material and chosen grab bar)
    • Optional: Safety glasses, dust mask, caulk

Installation steps:

  1. Locate the studs: Use a stud finder to mark the locations of studs behind the wall where you plan to install the grab bar. This is crucial for ensuring secure mounting as studs provide the most reliable support.
  2. Mark the mounting holes: Hold the grab bar against the wall, aligning it with the desired location and stud markings. Use a level to ensure proper alignment and mark the mounting holes through the grab bar template (if provided) or by directly marking the screw holes on the wall.
  3. Drill pilot holes (if required): This step depends on your wall material. For concrete or masonry walls, drilling pilot holes is necessary. Use the appropriate drill bit size for the screws or anchors you’ll be using.
  4. Install the grab bar:
    • Mounting on studs: If the mounting holes align with the studs, use the provided screws directly to secure the grab bar to the wall, tightening them firmly with a screwdriver.
    • Using anchors (for drywall or non-stud locations): Use the appropriate anchors and screws as per the manufacturer’s instructions. These anchors typically involve inserting them into the drilled holes and then screwing the grab bar into the anchored inserts.
  5. Apply caulk (optional): For additional water resistance, especially around bathtubs or showers, apply a thin line of caulk around the base of the grab bar where it meets the wall.

Additional tips:

  • Double-check everything: Ensure the grab bar is secure, level, and positioned appropriately before fully tightening the screws or applying caulk.
  • Consult a professional: If you are unsure about any aspect of the installation, especially if dealing with complex setups or load-bearing walls, consider consulting a professional handyman or contractor for assistance.

Remember, safety is paramount. Ensure proper installation following the manufacturer’s instructions and relevant building codes for secure and reliable grab bars.

Functional Capacity Evaluations (FCEs) and Physical Therapy
Written by Craig B

Functional Capacity Evaluations (FCEs) and Physical Therapy

Read on to learn more about functional capacity evaluations and physical therapy.

functional capacity evaluations and physical therapyFunctional Capacity Evaluations (FCEs):

  • What are they? An FCE is a set of tests administered by a qualified professional (usually a physical or occupational therapist) to assess your ability to perform daily activities and job-related tasks.
  • What do they involve? These tests typically include:
    • History taking: Discussing your medical history, current condition, and relevant goals.
    • Physical examination: Evaluating your musculoskeletal function, strength, range of motion, balance, and coordination.
    • Functional testing: Simulating activities from your daily life or work environment, like lifting weights, climbing stairs, or walking specific distances.
    • Psychological evaluation: Sometimes included to assess pain tolerance and coping mechanisms.
  • Purpose: FCEs are used for various reasons, including:
    • Determining your ability to return to work after an injury or illness.
    • Setting realistic goals for physical therapy.
    • Identifying areas for improvement and designing an effective treatment plan.
    • Providing objective data for disability claims or legal proceedings.

Physical Therapy:

  • What is it? Physical therapy is a healthcare profession that aims to restore, maintain, or improve physical function, mobility, and overall well-being through:
    • Exercise: Strengthening muscles, improving flexibility, and enhancing balance and coordination.
    • Manual therapy: Techniques like massage, joint mobilization, and soft tissue manipulation to reduce pain and improve movement.
    • Modalities: Using heat, cold, ultrasound, or electrical stimulation to manage pain and promote healing.
    • Education: Providing guidance on self-management strategies, injury prevention, and healthy lifestyle habits.
  • How does it relate to FCEs?
    • The information gathered from an FCE helps guide the physical therapist in developing a personalized treatment plan tailored to your specific needs and functional limitations.
    • As you progress through physical therapy, re-taking an FCE can track your improvement and measure the effectiveness of your treatment program.

Overall:

FCEs and physical therapy are often employed together to understand your functional capabilities and provide targeted interventions to help you regain or improve your ability to perform everyday activities and achieve your desired goals.

Additional notes:

  • The specific components of an FCE and physical therapy program may vary depending on your individual circumstances and diagnosis.
  • Consulting with a healthcare professional experienced in both FCEs and physical therapy can help you determine if these approaches are right for you.

What Happens At A Disability Functional Capacity Evaluation

A Disability Functional Capacity Evaluation (FCE) is a comprehensive assessment conducted by healthcare professionals, often occupational therapists or physical therapists, to evaluate an individual’s physical and functional abilities. The primary purpose of an FCE is to assess how an individual’s health condition, injury, or disability affects their capacity to perform various tasks and activities, particularly in a work-related context.

Key components of a Disability Functional Capacity Evaluation may include:

  1. Physical Assessment:
    • Strength and Endurance: The evaluation assesses the individual’s muscle strength and endurance, examining how well they can perform physical tasks over time.
    • Range of Motion: The range of motion in different joints is evaluated to determine any limitations or restrictions.
  2. Functional Activities:
    • Lifting and Carrying: The individual may be assessed on their ability to lift and carry objects of varying weights and sizes.
    • Pushing and Pulling: The evaluation may include tasks that involve pushing or pulling.
    • Bending and Stooping: The ability to bend, stoop, or squat may be evaluated.
    • Climbing: Depending on the individual’s job requirements, climbing tasks may be assessed.
  3. Posture and Mobility:
    • Sitting and Standing: The individual’s ability to sit and stand comfortably may be assessed, including the duration of time they can maintain these positions.
    • Walking: Walking patterns and distances may be evaluated.
    • Balancing: The assessment may include tasks that assess balance and coordination.
  4. Coordination and Dexterity:
    • Fine Motor Skills: The evaluation may assess fine motor skills, hand dexterity, and coordination.
    • Gripping and Manipulation: Tasks that involve gripping and manipulating objects may be included.
  5. Cognitive and Psychological Factors:
    • Attention and Concentration: The evaluation may assess the individual’s ability to focus and concentrate on tasks.
    • Memory: Memory-related tasks may be included.
    • Psychological Factors: Emotional and psychological factors that may impact performance are considered.
  6. Job-Specific Tasks:
    • Job Simulation: Depending on the individual’s occupation, the FCE may include specific job-related tasks to assess their ability to perform essential job functions.
  7. Report and Recommendations:
    • Following the assessment, a detailed report is typically generated. This report outlines the individual’s functional abilities, limitations, and recommendations for accommodations or modifications.

Disability Functional Capacity Evaluations are often used in workers’ compensation cases, disability determinations, rehabilitation planning, and return-to-work assessments. The information gathered from an FCE helps healthcare professionals, employers, insurers, and other stakeholders make informed decisions about an individual’s capabilities and limitations in the context of their work-related tasks.

Can Physical Therapy Improve My Quality Of Life?

Physical therapy has the potential to significantly improve your quality of life in numerous ways. Here are some potential benefits:

  • Reduced pain and discomfort: Physical therapy can address various causes of pain, from muscle strains and joint issues to chronic conditions like arthritis. By improving strength, flexibility, and movement patterns, physical therapy can significantly reduce pain and discomfort, allowing you to participate in activities you enjoy.
  • Improved mobility and function: Physical therapy can help you regain or improve your ability to move and perform daily activities, such as walking, climbing stairs, getting dressed, and bathing. This increased independence can boost confidence and self-esteem, leading to a better quality of life.
  • Enhanced balance and fall prevention: Physical therapy can improve your balance and coordination, reducing the risk of falls, which is especially important for older adults. This can provide peace of mind and allow you to engage in activities without fear of injury.
  • Better management of chronic conditions: Physical therapy can be an effective tool for managing chronic conditions like heart disease, diabetes, and chronic pain. By improving physical fitness and managing symptoms, physical therapy can help you live a more active and fulfilling life.
  • Improved mood and overall well-being: Physical activity has been shown to have a positive impact on mood and mental health. Physical therapy can help you increase your activity level, leading to reduced stress, anxiety, and depression, and promoting feelings of well-being.
  • Faster recovery from surgery or injury: Physical therapy is often crucial for recovering from surgery or injuries. By helping you regain strength, flexibility, and function, physical therapy can shorten your recovery time and get you back to your normal activities faster.
  • Reduced reliance on pain medication: Physical therapy can help manage pain, potentially reducing your dependence on pain medication and its side effects. This can lead to a safer and healthier lifestyle.
  • Improved sleep quality: Regular physical activity can promote better sleep quality. As physical therapy helps you become more active, you may experience improved sleep, further contributing to a better overall quality of life.

It’s important to note that the specific benefits of physical therapy will vary depending on your individual needs and goals. Consulting with a qualified physical therapist can help you determine if physical therapy is right for you and develop a personalized treatment plan to maximize your quality of life.

Remember, even if you are experiencing minimal limitations, physical therapy can still be beneficial in promoting overall health, preventing future injuries, and maintaining your independence as you age.

Related Posts

1 2 3 5